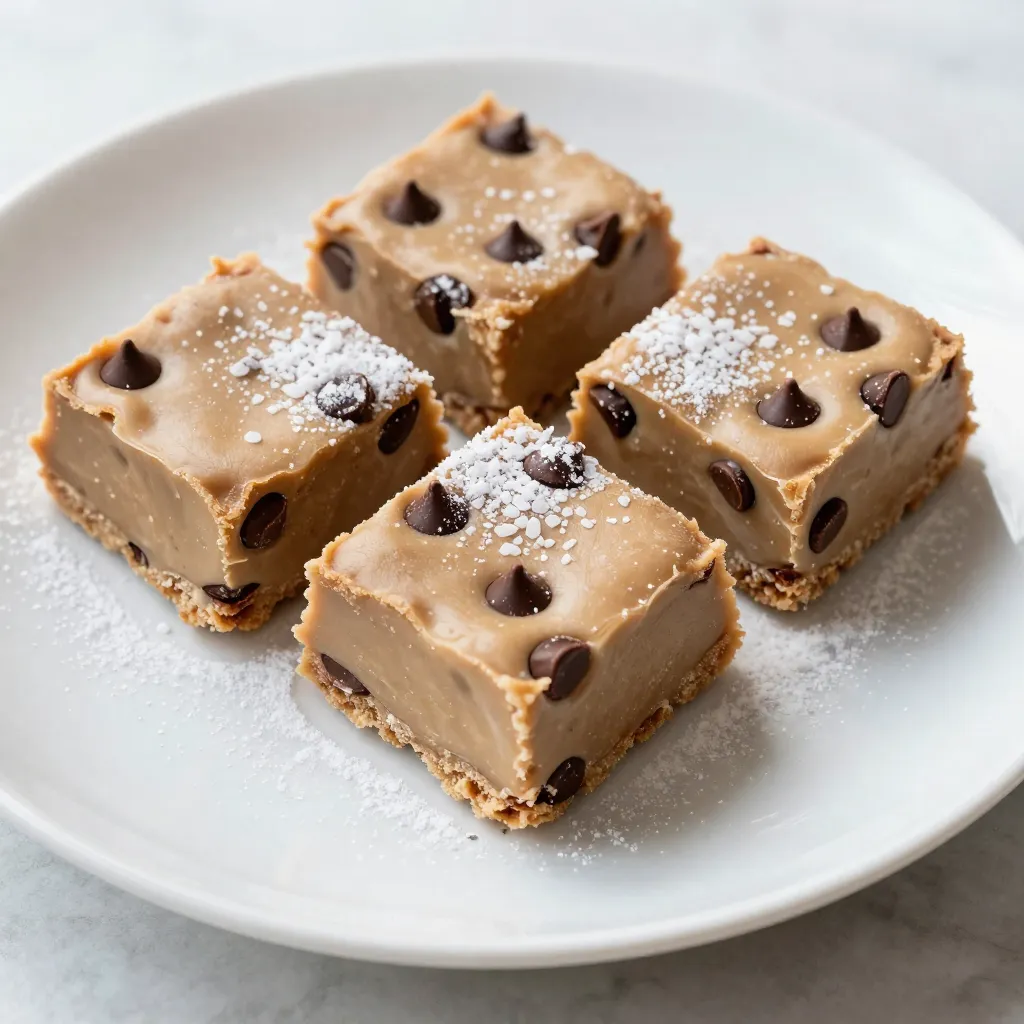
Do you love the sweet taste of cookie dough? If so, you will adore this Chocolate Chip Cookie Dough Fudge! This treat combines classic flavors into one creamy, decadent dessert. With just a few simple ingredients, you can whip up this tasty delight in no time. I’ll guide you through step-by-step instructions and share tips to make your fudge perfect. Let’s dive in and satisfy your sweet tooth!
Why I Love This Recipe
- Decadent Flavor: This fudge combines the rich, buttery taste of cookie dough with the sweetness of chocolate, creating an indulgent treat that’s hard to resist.
- Easy to Make: With simple ingredients and straightforward steps, this recipe is perfect for bakers of all skill levels, ensuring success every time.
- No Baking Required: Unlike traditional cookies, this fudge doesn’t require any baking, making it a quick and convenient dessert option.
- Customizable: You can easily modify this recipe by adding nuts, different types of chocolate, or even a sprinkle of sea salt for a gourmet touch.
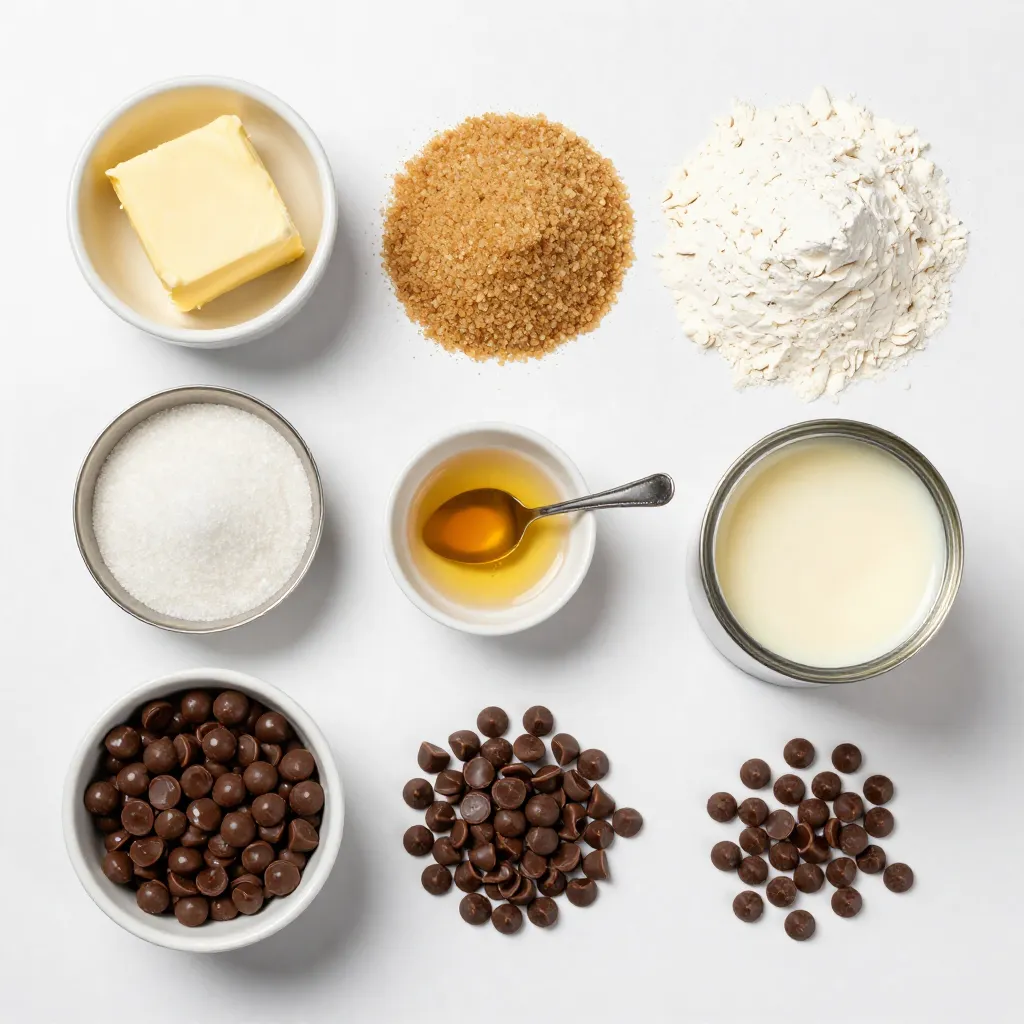
Ingredients
List of Ingredients
– 1 cup unsalted butter
– 1 cup brown sugar
– 1/2 cup granulated sugar
– 2 cups all-purpose flour
– 1 teaspoon vanilla extract
– 1 can sweetened condensed milk
– 1 cup mini chocolate chips
Gathering the right ingredients is key to making a great treat. Here’s what you need. Start with one cup of unsalted butter. This will give your fudge a rich flavor. Use one cup of brown sugar for sweetness and depth. Then, add half a cup of granulated sugar to balance the taste.
Next, you’ll need two cups of all-purpose flour. Don’t forget to heat-treat this flour first. It makes sure it’s safe to eat raw. You can do this by baking it at 350°F for 5-7 minutes. After that, let it cool.
For flavor, add one teaspoon of vanilla extract. This will enhance the overall taste of your fudge. You also need one can of sweetened condensed milk. This ingredient adds creaminess to your fudge. Lastly, use one cup of mini chocolate chips. These will melt into the fudge, adding delicious bites of chocolate.
With these ingredients, you’re ready to create a delightful treat!
Step-by-Step Instructions
Preparing the Flour
To make this fudge safe, we need to heat-treat the flour. Start by preheating your oven to 350°F (175°C). Spread the all-purpose flour evenly on a baking sheet. Bake it for 5-7 minutes. This process kills any harmful bacteria. After baking, let the flour cool completely before using it.
Making the Dough Mixture
Next, we’ll make the cookie dough mixture. In a large mixing bowl, use an electric mixer to cream the softened butter with both sugars. Mix until the mixture turns light and fluffy. This step adds air and makes the fudge soft. Add the pure vanilla extract and blend until it is well mixed.
Combining Ingredients
Now, it’s time to bring it all together. Gradually add the cooled, heat-treated flour to the butter-sugar blend. Mix on low speed to combine. Stop to scrape down the bowl’s sides as needed. This ensures that everything is mixed well.
Finalizing the Mixture
Once the flour is combined, we will add the sweetened condensed milk. Pour it in and stir until you have a cohesive dough. It might feel a bit sticky, and that’s just fine! Next, gently fold in the mini chocolate chips. Use a spatula or wooden spoon to make sure they are evenly spread throughout the dough.
Setting the Fudge
Let’s prepare the fudge base. Line an 8×8 inch baking dish with parchment paper. Leave some overhang so you can lift it out later. Press the cookie dough mixture firmly into the dish’s bottom. Smooth it out with a spatula until it is flat. For an extra treat, sprinkle more mini chocolate chips on top to make it look great!
Tips & Tricks
Ensuring Perfect Consistency
To make your fudge smooth, follow these mixing tips. Start by creaming the butter and sugars well. This step adds air, making the fudge light. Use a low speed when adding flour. This helps mix without lumps. After mixing in the flour, add the sweetened condensed milk. Stir until the dough is sticky but smooth. If you find it too sticky, let it chill for a bit. This will help firm it up.
Presentation Tips
For an eye-catching display, arrange your fudge squares neatly on a platter. Use a sharp knife for clean cuts. Dust the top lightly with powdered sugar. This adds a nice touch and looks great. You can also sprinkle extra mini chocolate chips on top. This not only makes it pretty but adds more chocolate flavor. Finally, a gentle sprinkle of sea salt brings out the sweetness. It’s a simple way to add contrast and pop!
Enhancements
Want to elevate your fudge? Try a sprinkle of sea salt on top. It adds a savory bite that pairs perfectly with the sweet fudge. Another option is to dust with powdered sugar for a snowy effect. You can also add more mini chocolate chips on top for an extra treat. These enhancements make your fudge even more delightful and appealing!
Pro Tips
- Heat-Treat Flour for Safety: Always heat-treat your flour before using it in no-bake recipes to eliminate any harmful bacteria.
- Softened Butter is Key: Make sure your butter is at room temperature to achieve a light and fluffy texture when creaming with sugars.
- Chill for Perfect Texture: Allow the fudge to chill for a minimum of 2 hours to help it set properly, ensuring clean cuts and a firm texture.
- Customize with Mix-Ins: Feel free to add other toppings like nuts or caramel swirls to personalize your fudge and enhance flavor.
Variations
Flavor Additions
You can easily change the taste of your fudge. Adding nuts gives a nice crunch. Chopped walnuts, pecans, or almonds work well. You can also mix in flavors like peanut butter or butterscotch. Just make sure to keep the total mix similar to the original recipe.
Chocolate Types
The type of chocolate you use can change the fudge’s taste. Dark chocolate gives a rich, bold flavor. White chocolate adds creaminess and sweetness. You can even mix different chocolates for a fun twist. Just substitute them based on your taste preference.
Alternative Sweeteners
If you need to cut sugar, try alternative sweeteners. Stevia and monk fruit are good options. Both can sweeten without extra calories. Just remember to adjust the amounts based on the sweetener you choose. This way, you can enjoy fudge that fits your diet.
Storage Info
Best Practices for Storage
To keep your chocolate chip cookie dough fudge fresh, store it in an airtight container. Line the container with parchment paper for easy removal. This way, the fudge won’t stick. Keep it in a cool, dry place, away from sunlight. If you want to keep it for longer, the fridge is a great choice. Just remember to let it cool completely before sealing it up.
Freezing Instructions
Freezing fudge is simple. First, cut the fudge into squares. Then, wrap each piece in plastic wrap. Place the wrapped pieces in a freezer-safe bag or container. Make sure to remove as much air as possible. When you want to enjoy it again, take a piece out and let it thaw at room temperature. This usually takes about 30 minutes.
Shelf Life
At room temperature, fudge lasts about a week if stored correctly. In the fridge, it stays good for up to two weeks. If you freeze it, you can keep it for up to three months. Just remember, the longer it sits, the more it may lose its texture. Enjoy your fudge fresh for the best taste!
FAQs
Can I use regular flour instead of heat-treated flour?
No, you should not use regular flour. Heat-treated flour is safe to eat raw. It removes harmful bacteria. This step is crucial for safety. If you skip it, you risk foodborne illness. Always heat-treat your flour at 350°F for 5-7 minutes. This simple step makes your fudge safe and delicious.
How long does the fudge need to chill?
The fudge needs to chill for at least 2 hours. This time allows it to set properly. If you want firmer fudge, chill it longer. Check it after two hours. If it feels soft, give it more time. Proper chilling helps you cut clean squares later.
How to cut fudge perfectly?
To cut fudge perfectly, use a sharp knife. Warm the knife under hot water first. This helps create clean cuts. Wipe the knife dry after warming. Cut the fudge into even squares. You can use parchment overhang to lift it out. This makes serving easy and neat.
This blog post covered how to make delicious fudge. We shared the key ingredients and step-by-step instructions, ensuring your fudge turns out perfectly. You learned tips for presentation and variations to explore. Proper storage advice will keep your fudge fresh longer.
Enjoying your homemade fudge can be a fun experience. Keep experimenting with flavors and share your creations with friends. Happy bakin