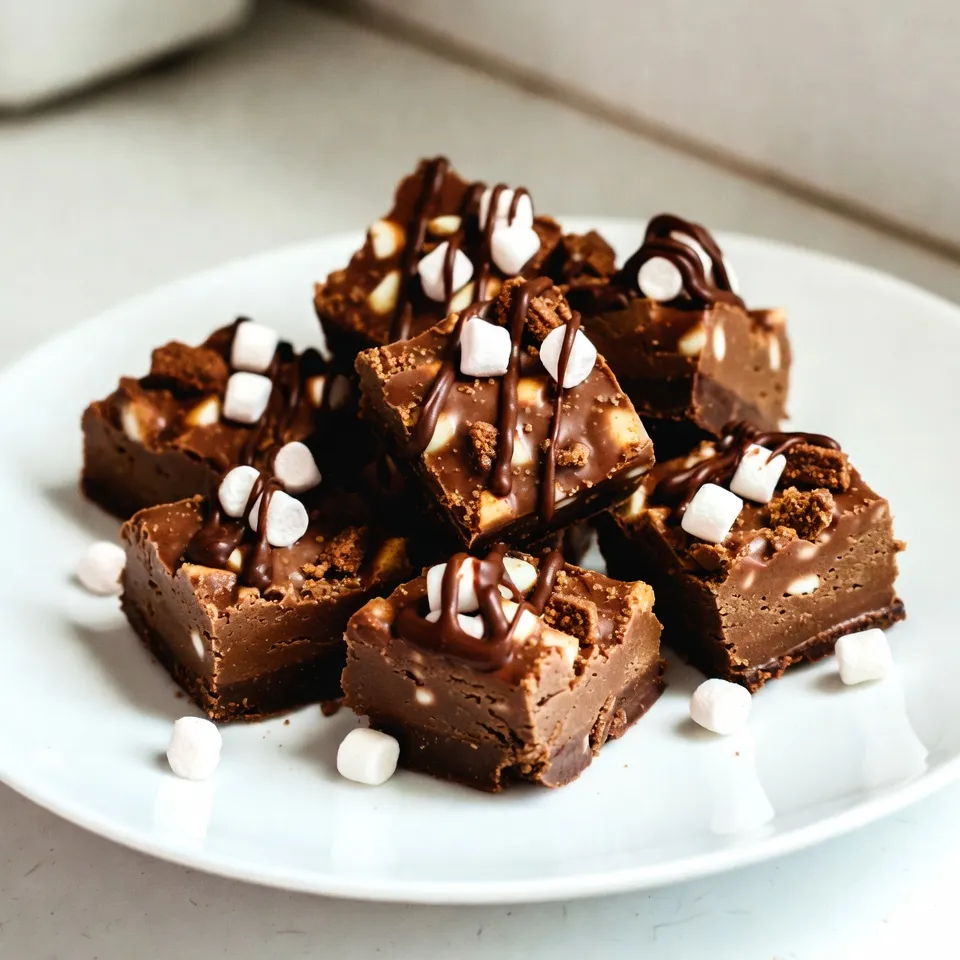
Get ready for a sweet adventure with my Chocolate Marshmallow Rocky Road Fudge Delight! This no-bake treat mixes rich, glossy chocolate with fluffy marshmallows, crunchy nuts, and graham cracker crumbs for a texture explosion. Whether you’re a seasoned chef or a kitchen newbie, I’ll guide you step-by-step to create this easy dessert. Buckle up for a chocolate experience you won’t forget! Ready to dive in? Let’s go!
Why I Love This Recipe
- Decadent Flavor Combination: This fudge combines rich chocolate, creamy marshmallows, and crunchy nuts, creating a delightful treat that satisfies every sweet tooth.
- Easy to Make: With just a few simple ingredients and straightforward steps, this recipe is perfect for both beginners and experienced bakers.
- Perfect for Sharing: Cut into bite-sized squares, this fudge is ideal for parties, potlucks, or as a delightful homemade gift to friends and family.
- Customizable Treat: You can easily swap out the nuts or add different mix-ins like dried fruit or additional chocolate, making it versatile for everyone’s taste.
Ingredients
List of Ingredients
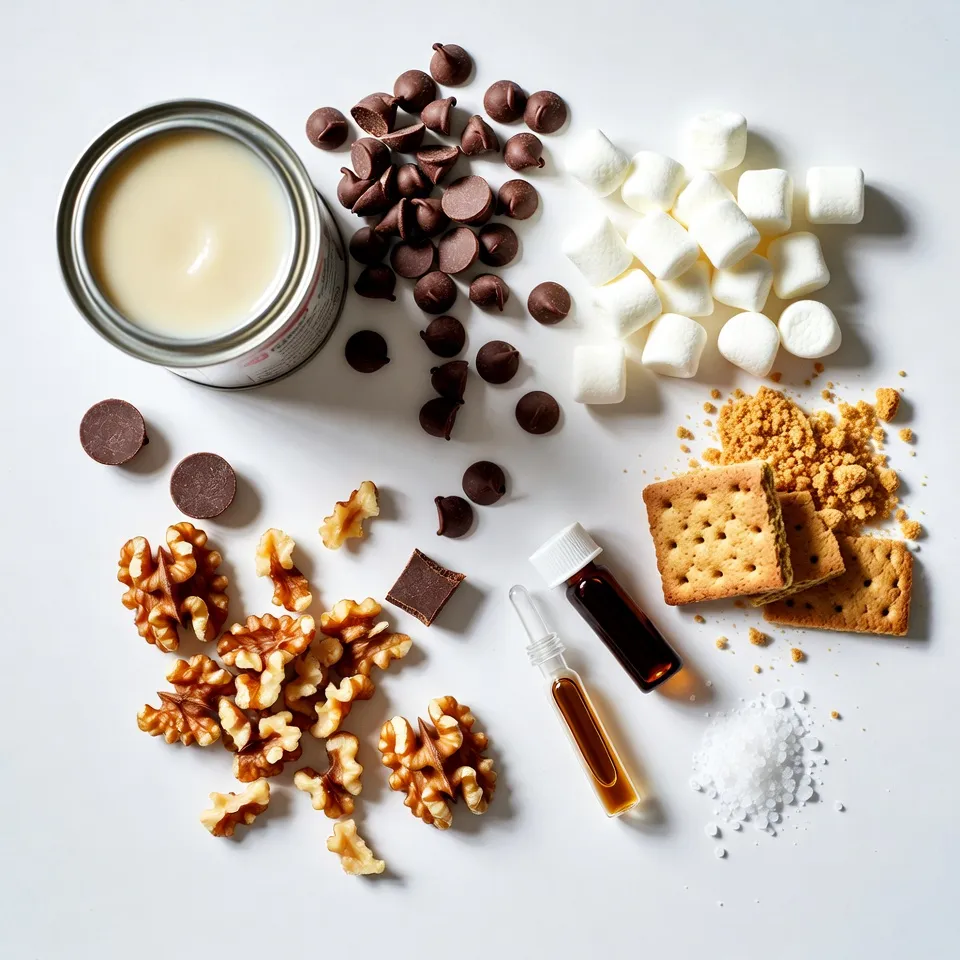
– 2 cups semi-sweet chocolate chips
– 1 cup sweetened condensed milk
– 1 cup mini marshmallows
– 1 cup graham cracker crumbs
– ½ cup chopped walnuts (or your choice of nuts)
– 1 teaspoon vanilla extract
– A pinch of salt
Suggested Quality of Ingredients
Choosing the best chocolate chips
I recommend using high-quality semi-sweet chocolate chips. They melt nicely and taste rich. Brands like Ghirardelli or Guittard offer great options.
Types of nuts for flavor and texture
Chopped walnuts add a nice crunch. You can also use pecans or almonds for a different taste. Make sure to chop them evenly for the best texture.
Fresh vs. stale marshmallows
Fresh mini marshmallows work best in this recipe. Stale marshmallows can become hard and chewy. Check your marshmallows for softness before using them. Fresh ones will give your fudge that delightful, gooey texture.
Step-by-Step Instructions
Preparation of Baking Dish
Start by lining an 8×8-inch square baking dish with parchment paper. Let the edges hang over the sides. This step helps you lift the fudge out easily later. Set this dish aside for when you’re ready to pour the fudge.
Melting the Chocolate
In a medium saucepan, combine 2 cups of semi-sweet chocolate chips and 1 cup of sweetened condensed milk. Place the saucepan over low heat. Stir this mix continuously to prevent burning. You’ll want the chocolate to melt into a smooth and creamy mixture.
Incorporating Flavorings
Once the chocolate is melted, take the saucepan off the heat. Stir in 1 teaspoon of vanilla extract and a pinch of salt. Mixing these ingredients into the chocolate adds depth to the flavor. Make sure everything combines well for a rich taste.
Folding in Additional Ingredients
Now it’s time to fold in the fun stuff! Gently add in 1 cup of graham cracker crumbs, ½ cup of chopped walnuts, and 1 cup of mini marshmallows. Use a spatula to fold them in carefully. Be gentle to avoid crushing the marshmallows. You want an even mix of flavors and textures in your fudge.
Transferring and Chilling
Carefully pour the fudge mixture into your prepared baking dish. Use the spatula to spread it out evenly. Press down gently to compact the fudge, making it denser. Place the dish in the refrigerator for at least 2 hours. This helps the fudge set properly, so it holds its shape when you cut it.
Tips & Tricks
Best Practices for Fudge Making
To make great fudge, avoid common mistakes. First, do not rush the melting process. Use low heat to melt the chocolate and sweetened condensed milk. Stir constantly. If the heat is too high, the chocolate can burn. This ruins the flavor and texture.
Next, check your measurements. Too much liquid can make fudge too soft. Too little can make it hard. Use a kitchen scale for accuracy if needed. Follow the recipe each step of the way.
Presentation Tips
To present your fudge, arrange the squares on a nice plate. Use a decorative platter for a fun look. Drizzle warm melted chocolate over the top. This adds a rich touch. You can also sprinkle extra mini marshmallows for color and texture. A few chopped nuts can add a nice crunch too.
Troubleshooting Common Issues
If your fudge is too soft, try chilling it longer. It may need more time to set. If it stays soft, you can reheat it gently. Add more chocolate chips and mix well. Then, set it again in the fridge.
If your fudge is too hard, warm it slightly in the microwave. Do this in short bursts. Mix in a bit of sweetened condensed milk. This can help soften it. Always aim for that perfect, smooth texture!
Pro Tips
- Use High-Quality Chocolate: The flavor of your fudge heavily depends on the chocolate you use. Opt for high-quality semi-sweet chocolate chips for the best results.
- Customize Your Nuts: Feel free to swap out the walnuts for your favorite nuts or even use a mix of nuts for added texture and flavor.
- Chill for Optimal Texture: Make sure to chill the fudge until fully set. This will ensure a firmer texture that’s easier to cut and more enjoyable to eat.
- Store Properly: Keep any leftover fudge in an airtight container at room temperature or in the fridge for up to a week for maximum freshness.
Variations
Chocolate Variations
You can change the chocolate type to suit your taste. Dark chocolate gives a rich flavor. It is more intense than semi-sweet chocolate. If you like a sweeter fudge, stick with semi-sweet. You can also try white chocolate. It adds a creamy twist and works well with fruity flavors. This choice can make your fudge unique and fun.
Add-Ins and Substitutes
You can mix in different nuts and dried fruits. Almonds and pecans add a nice crunch. Dried cherries or cranberries can boost sweetness. If you want gluten-free options, swap graham crackers for gluten-free ones. This keeps the fudge delicious for everyone. Just make sure to check labels for hidden gluten.
Seasonal Variations
Make your fudge special for holidays. For Halloween, add orange and black sprinkles. At Christmas, mix in peppermint bits for a fresh taste. You can even use seasonal flavors like pumpkin spice in the fall. Each occasion is a chance to create a new flavor of Rocky Road fudge. Let your creativity shine!
Storage Info
Best Practices for Storage
To keep your Chocolate Marshmallow Rocky Road Fudge fresh, store it properly. First, let the fudge cool completely. Then, cut it into squares. Place the squares in an airtight container. Use parchment paper between the layers to prevent sticking. You can also wrap each piece in plastic wrap for extra protection.
Shelf Life
Rocky Road fudge lasts about one week at room temperature. Keep it in a cool, dry place away from sunlight. If you want it to last longer, you can freeze it. Wrapped properly, it can last up to three months in the freezer.
Signs of Spoilage
Check for signs that your fudge has gone bad. If it has a strange smell or changes color, it is best to discard it. Mold is another clear sign of spoilage. To prevent spoilage, always use clean utensils when cutting the fudge and store it in a cool place.
FAQs
Can I use milk chocolate instead of semi-sweet?
Yes, you can use milk chocolate. It will make the fudge sweeter and creamier. The texture will be softer, too. Semi-sweet chocolate gives a nice balance of sweet and rich flavors. Milk chocolate can be a fun twist, especially for kids.
Is there a vegan alternative for this fudge?
Absolutely! You can swap out the sweetened condensed milk for coconut cream or almond milk. Use vegan chocolate chips instead of semi-sweet. Make sure to use plant-based nuts and marshmallows. This way, you keep the flavor and make it vegan-friendly.
How do I cut fudge for the best results?
To cut fudge well, chill it completely first. Use a sharp knife to slice cleanly. Wipe the knife with a damp cloth between cuts for neat edges. You can also use a plastic knife for a smoother cut. This will give you nice, even pieces.
Can I make this fudge in advance?
Yes, you can make it ahead of time! Store the fudge in an airtight container in the fridge for up to two weeks. If you want to keep it longer, freeze it for up to three months. Just let it thaw in the fridge before serving.
You now have a clear guide to making Rocky Road fudge. From selecting quality ingredients to delicious variations, you are ready to create a treat that delights. Remember, using fresh ingredients makes a big difference. Whether you enjoy it yourself or share with others, this fudge is sure to impress. Follow the tips and tricks to avoid common mistakes and achieve the best texture. This easy dessert offers endless possibilities. Dive into your fudge-making adventure and enjoy every bit