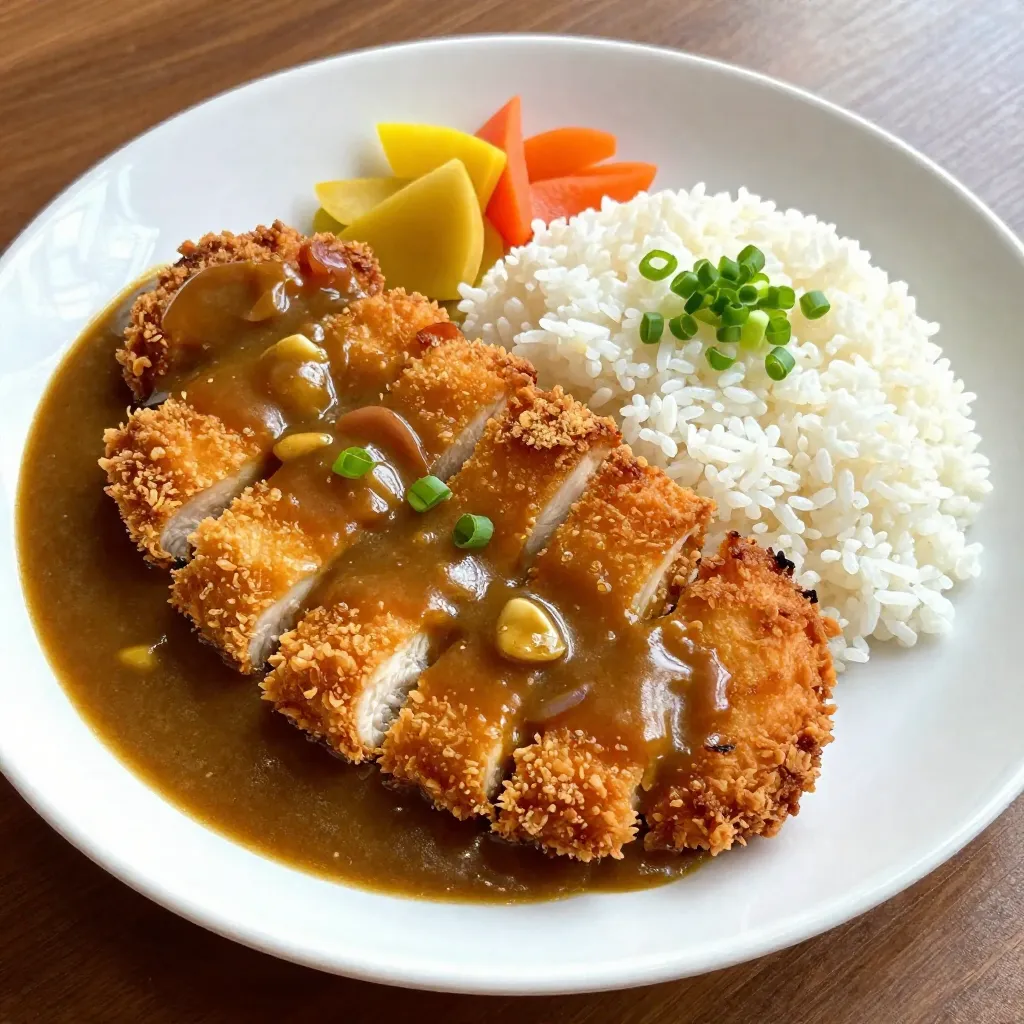
Are you ready to elevate your dinner game? Crispy Chicken Katsu with Curry Sauce is the dish you’ve been craving! This recipe features tender chicken coated in crunchy panko and topped with a rich, flavorful curry sauce. Perfect for impressing family or friends, it balances comfort with a touch of adventure. Follow my simple steps, and you’ll have a delightful meal on the table in no time. Let’s dive in!
Why I Love This Recipe
- Crispy Texture: The panko breadcrumbs create an irresistible crunch that complements the tender chicken perfectly.
- Savory Sauce: The curry sauce adds a rich flavor profile that elevates the dish, making it comforting and satisfying.
- Quick and Easy: This recipe is straightforward and can be prepared in under an hour, making it perfect for weeknight dinners.
- Versatile Dish: Chicken Katsu can be served with rice, salad, or even in a sandwich, offering endless serving possibilities.
Ingredients
Main Ingredients for Chicken Katsu
– 2 boneless, skinless chicken breasts
– Salt and pepper to taste
– 1 cup all-purpose flour
– 2 large eggs, beaten
– 2 cups panko bread crumbs
– Vegetable oil for frying
Ingredients for Curry Sauce
– 1 tablespoon sesame oil
– 2 tablespoons curry powder
– 1 tablespoon soy sauce
– 1 cup chicken broth
– 1 tablespoon honey
– 1/2 cup coconut milk
– 1/2 onion, finely chopped
– 2 cloves garlic, minced
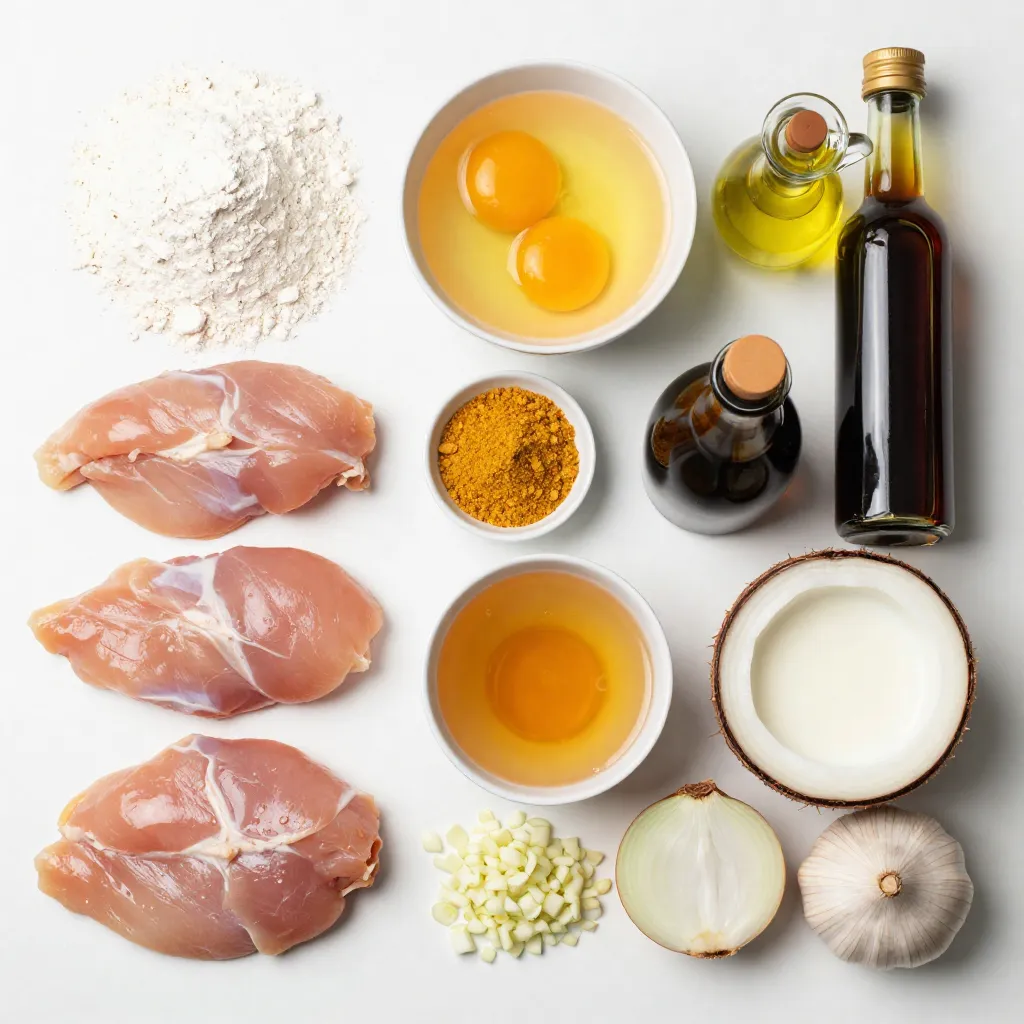
When I cook chicken katsu, I start with fresh chicken breasts. I prefer boneless and skinless because they cook evenly. Salt and pepper are essential for flavor.
I gather my breading ingredients next. All-purpose flour gives the chicken a nice base. Beaten eggs create a sticky layer. Panko bread crumbs add that perfect crunch.
For frying, I use vegetable oil. It should be deep enough to cover the chicken.
Now, let’s turn to the curry sauce. I love using sesame oil for its rich taste. Curry powder gives it that warm, spicy kick. Soy sauce adds depth, while honey balances the flavors.
Chicken broth is key for a savory base. Coconut milk makes the sauce creamy and smooth. Finally, I add finely chopped onion and minced garlic for aroma and taste. These ingredients come together to create a delightful dish.
Step-by-Step Instructions
Preparation of Chicken
– Pound chicken breasts to 1/2 inch thickness.
– Season with salt and pepper.
To start, take your chicken breasts and place them between plastic wrap. Use a meat mallet to gently pound them. This helps the chicken cook evenly. Don’t forget to season both sides with salt and pepper. This adds great flavor.
Breading Process
– Set up flour, eggs, and panko breading stations.
– Coat chicken with flour, eggs, and then panko.
Next, get your breading stations ready. In one dish, add all-purpose flour. In another, place beaten eggs. In the last dish, spread out panko bread crumbs. This order makes breading easy. Take a chicken breast, dip it in flour first. Shake off any extra flour. Next, dunk it in the eggs, letting any excess drip off. Finally, press it into the panko. Make sure it’s well-coated. Repeat this for the second breast.
Cooking the Chicken
– Fry chicken in vegetable oil until golden brown.
– Drain on paper towels.
Now it’s time to fry the chicken. In a large skillet, pour enough vegetable oil to cover the bottom. Heat it over medium-high until it shimmers. Add the breaded chicken carefully. Fry each side for 3-4 minutes. You want them golden brown and crispy. Once done, place them on paper towels to absorb excess oil.
Making the Curry Sauce
– Sauté onions and garlic in sesame oil.
– Incorporate curry powder and liquids.
– Simmer until thickened.
In a separate saucepan, heat sesame oil over medium heat. Add finely chopped onion and sauté for 3-4 minutes, until it’s soft. Then, add minced garlic and cook for one more minute. Next, sprinkle in the curry powder and stir for about 30 seconds. This brings out the flavor. Now, pour in chicken broth, soy sauce, honey, and coconut milk. Bring to a gentle simmer for 5-7 minutes. Stir occasionally until it thickens.
Serving the Dish
– Slice chicken katsu and drizzle with curry sauce.
Once the chicken cools for a minute, slice it into strips. Place the chicken katsu on a plate and drizzle that tasty curry sauce over the top. Enjoy your delicious meal!
Tips & Tricks
Perfecting the Chicken Katsu
– Ensure even thickness for even cooking: Pound your chicken breasts to about 1/2 inch. This helps them cook evenly. If one part is thicker, it may not cook right.
– Use a thermometer to check oil temperature: Heat your vegetable oil until it reaches 350°F. This helps create a crispy crust. If the oil is not hot enough, the chicken will absorb too much oil and become greasy.
Enhancing the Curry Sauce
– Adjust spice levels by adding more curry powder: If you like a stronger flavor, add more curry powder to your sauce. Just a little bit can change the taste a lot.
– Optional: Add vegetables for added texture: Consider adding diced carrots or bell peppers. They add crunch and flavor to your sauce.
Presentation Ideas
– Garnish with green onions: Chop green onions and sprinkle them on top of the chicken. This adds color and freshness.
– Serve with steamed rice and pickled vegetables: A side of fluffy rice balances the rich curry sauce. Pickled veggies add a nice contrast to the dish.
Pro Tips
- Use a Meat Thermometer: To ensure your chicken is cooked perfectly, use a meat thermometer. The internal temperature should reach 165°F (74°C).
- Double Breading for Extra Crispiness: For an ultra-crispy texture, consider double breading your chicken. After the first coat of panko, dip it back into the egg and then coat again with panko.
- Let the Chicken Rest: After frying, allow the chicken to rest for a few minutes before slicing. This helps retain moisture and ensures a juicy result.
- Customize the Curry Sauce: Feel free to adjust the curry sauce to your taste. Add more honey for sweetness or extra curry powder for a punchier flavor.
Variations
Different Protein Options
You can switch up the protein in chicken katsu. Pork chops work great instead of chicken. Simply follow the same steps for breading and frying. Tofu is another tasty option for a vegetarian version. Choose firm tofu, slice it, and press out extra moisture. Coat it the same way as chicken or pork.
Alternative Sauces
Curry sauce is delicious, but you can try other flavors too. Teriyaki sauce adds a sweet and savory twist. Just brush it over your katsu before serving. Sweet and sour sauce is another fun choice. It gives a nice zing that pairs well with crispy meat. Experimenting with these sauces can change your meal’s vibe.
Dietary Modifications
If you need gluten-free options, you can easily adapt the recipe. Use gluten-free flour and panko bread crumbs for the coating. This way, everyone can enjoy crispy chicken katsu. Just ensure that the sauces are also gluten-free. Double-check labels to stay safe and enjoy your meal!
Storage Info
Leftovers Storage
After enjoying your crispy chicken katsu, store any leftovers in an airtight container. Make sure the container seals well. This will keep your chicken fresh for up to three days in the fridge.
Reheating Tips
To reheat your chicken, use the oven. Preheat it to 375°F (190°C). Place the chicken on a baking sheet and heat for about 10-15 minutes. This method keeps the chicken crispy and tasty, rather than soggy.
Freezing Instructions
If you have extra breaded chicken, you can freeze it for later use. Lay the chicken on a baking sheet and freeze it for a few hours until solid. Once frozen, transfer the chicken to a freezer-safe bag. It can last up to three months in the freezer. When ready to cook, just thaw and fry!
FAQs
What is Chicken Katsu?
Chicken katsu is a Japanese dish. It features breaded and fried chicken. The word “katsu” means “cutlet” in Japanese. It has roots in Western-style cooking. Many believe it came from the French dish, “côtelette.” Chicken katsu is popular for its crispy coating and juicy meat inside. It is often served with rice and tonkatsu sauce.
Can I make this recipe ahead of time?
Yes, you can prepare chicken katsu ahead. First, bread the chicken and store it in the fridge. Keep it covered to prevent drying out. You can also make the curry sauce earlier. Just reheat it on the stove before serving. Fry the chicken fresh for the best texture.
What sides pair well with Chicken Katsu?
Chicken katsu tastes great with many sides. Here are a few ideas:
– Steamed rice
– Pickled vegetables
– Cabbage salad
– Miso soup
– Edamame
These sides add color and flavor to your meal.
How do I achieve the crispiest texture?
For crispy chicken katsu, follow these tips:
– Use panko bread crumbs for a light crunch.
– Make sure the oil is hot enough before frying.
– Fry the chicken in small batches for even cooking.
– Drain the cooked chicken on paper towels to remove excess oil.
These steps will help you get that perfect crispy texture.
In this post, we covered how to make Chicken Katsu with a tasty curry sauce. We discussed the main ingredients, detailed step-by-step instructions, tips for perfecting the dish, and variations you can try. Remember, achieving a crispy texture is key. Don’t hesitate to experiment with different proteins or sauces to find your favorite taste. Enjoy your cooking adventure, and savor each bite of this delicious dis